How to install Google Analytics Tracking Code
How to install Google Analytics Tracking Code on your WordPress site
Do you have a website but still don’t have Google Analytics Tracking Code installed because you don’t know how to do it?
Most developers and web design agencies install Google Analytics as soon as the site goes live, as they are aware of its importance. However, if this is not your case, in the following lines, you will learn how to install Google Analytics Tracking Code on your website.
Benefits of installing Google Analytics Tracking Code on your WordPress website
Having a website doesn’t guarantee success. Millions of new websites go live every day. To check this out, you just need to run any search query and take note of the number of results. Then wait a few days and perform the same search. You will see that the number of results has increased. In the following example I searched for “new websites” and the number of results was 711,000,000. How many results appear now?

– So how can you be noticed by your target audience in this sea of websites?
– Working on your SEO, PPC and overall Marketing Strategy.
– But how will you know if you are moving in the right direction with your actions?
– Here is where Analytics comes into play. It is essential not only to know where we are, but also where to go next.
Some of the main benefits of installing Google Analytics on your site are the following:
Optimise Marketing Campaigns.
You have created an Adwords campaign and you see that you receive many clicks on the ads, but what are the users doing after they arrive to your site? Google Analytics can be linked to your Adwords account and will give you this information. This will allow you to test, modify and improve your campaign results.
Control whether you’re attracting the right audience.
Google Analytics provides you with lots of detailed information about your website visitors: demographics, geographic data, devices, technology, interests, if they are performing the desired actions, etc. Those insights will help you with your marketing strategy. If you’re targeting 50 year old business people and you receive visits from teenagers, you are probably not sending the right message, or using the correct channels, etc. and you will need to review your marketing strategy.
Improve your website structure and content.
Which are the most successful pages among your users? Is there any part of the conversion process where the bounce rate is higher and therefore there is space for improvement?
Maximise ROI.
Which are the most profitable channels? Which city is bringing more leads?
Step by Step guide on how to install Google Analytics Tracking Code
Are you convinced yet of installing Google Analytics on your site? If so, let’s go!
- The first step is to go to https://www.google.ie/analytics

- Click on “Sign In”, on the right top corner and a drop-down menu will appear.
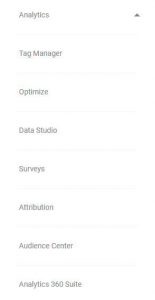
- Once you click, the drop-down will show all of the available options, and you should select “Analytics”.
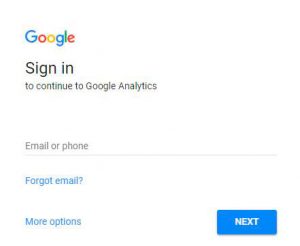
- The next step will ask you to enter your gmail username and password.
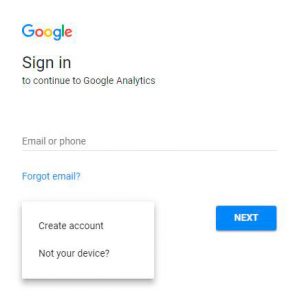
- If you don’t have a Gmail account, click on the “More options” field. The option to create an account will appear.
- Once you have created your account you can then enter your new details and access the Google Analytics interface.
- As this is the first time that you have accessed your account, the screen will look like as shown below.
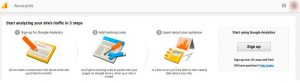
- To begin using Analytics you will need to click on the “Sign Up” button on the right.
- Immediately, you will be able to create your new Google Analytics account and modify its settings:
- Tracking Method.
Choose Website.

- Setting up Your Account
- Account name. Type your Company name.
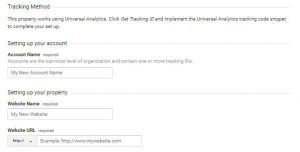
- Setting up Your Property
- Website name. Type your website name.
- Website URL. In this field, you need to enter your website URL.
- Industry Category
On the industry category drop-down, you should choose the industry which best represents your business.

- Reporting Time Zone
The data will be shown with the time related to the chosen time zone.
- Data sharing settings
Sharing data with Google allows Google to improve. It is up to you whether you decide to share information or not.

- Once you have filled in all the settings, click the “Get Tracking ID” button at the bottom of the screen.
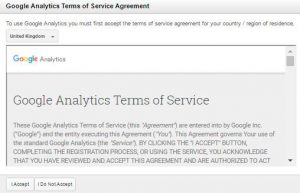
- To continue, you will need to accept the “Google Analytics Terms of Service Agreement”.
- Forthwith, you will be prompted with the Analytics tracking code.
![]()
(The following instructions are for a WordPress site).
Now that we finally have the code, you need to copy and paste it as the first item into the <head> tag. But where is the <head> tag?
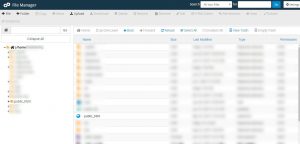
- Request access to the control panel or “CPanel” from your hosting company. Then once you’re on the “CPanel”, go to “File Manager”.

- When you’re inside the File Manager you will have access to all of the files on your website. Go to the “public_html” folder > “wp-content” folder > “themes” folder.
- Once inside the “themes” folder, choose the folder with the name of the theme that your website is using. If you don’t know which theme your website is using, go to your WordPress Website Dashboard > Appearance > Themes, and you will see the name of the theme that is installed.
- Once there, look for a file called “header.php”, then click once on top of it and download it. Leave the File Manager open as we will be coming back to it in a second.
- Open the “header.php” file with Notepad ++ (Notepad ++ can be downloaded for free), and then add your new Analytics Tracking Code just after the <head> tag.
![]()
- Now save the file on your computer as “header.php”
- Let’s return to File Manager. Look for the original file “header.php”, click once on it and rename it to “header_bak.php”. Then upload your new “header.php” which includes the Analytics Tracking Code.
We keep the old “header.php” file as a back-up in case something goes wrong. We can always delete the new “header.php” file and rename the old one to its original name.
That’s it! The Analytics code has been added to the site. It wasn’t that hard, was it?
How to verify that your Google Analytics Tracking code has been installed correctly
Once you have installed Google Analytics Tracking Code on your site, we need to verify that everything is working correctly.
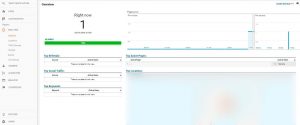
1.Real Time Analytics
The first thing to do is to access your Analytics account and navigate to Real Time. While there, visit your website and magic… there you are!
2.Source Code
We can also check the Analytics code by viewing the source code of the webpage. Open your website and press “Ctrl+u” to view the source code.
Then press “Ctrl+f”, to perform a text search for your analytics tracking code. Type your Analytics Tracking Code on the field that appears. Your Analytics Tracking Code is the one which starts with UA followed by 9+1 numbers (UA-XXXXXXXXX-X).
The search field will let you know where it is.
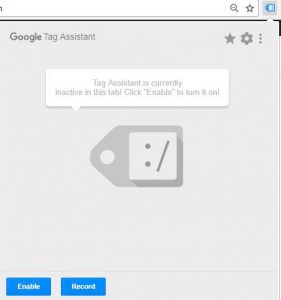
3.Google Tag Assistant
And one last way to check is by installing Google Tag Assistant on your Chrome web browser.
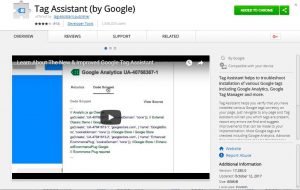
Once it’s installed, click on the new icon which appears on the Google Chrome bar, then click enable and reload the page. Google Tag Assistant will let you know if the code has been installed correctly.
That’s all! Now you have installed your Google Analytics Tracking code.
I hope this blog post has been useful. Now be brave and install the Google Analytics Tracking Code to your website. If you prefer that I install it for you, or if you have any questions on the process, feel free to contact me and I’ll be happy to help you out. Happy Tracking!
Leave a Reply